Jump to

How To Fix Speaker Wire In Your Car?: Proven Methods

How To Fix Speaker Wire In Your Car?: Proven Methods

Fix Speaker Wire

Are you experiencing issues with the sound quality of your car’s audio system? One common culprit could be a faulty speaker wire. Damaged or loose wires can cause static, distortion, or complete audio dropout, resulting in a less-than-ideal listening experience.

In this article, we will discuss how to identify and fix speaker wire problems in your car. By following these simple steps, you can ensure that your car’s audio system works at its best, delivering crystal-clear sound for your driving enjoyment. 

Proven Methods: Fix Speaker Wire In Your Car

Method 1: Twist and Tape

Materials and Tools

  1. Electrical tape

Steps

  1. Identify the damaged section of the speaker wire.
  2. Ensure the car’s power source is disconnected.
  3. Remove any necessary panels to access the speaker and wiring.
  4. If necessary, check for damage and remove the affected section.
  5. Twist the exposed copper wires from both ends together securely.
  6. Wrap the twisted wires with electrical tape to insulate the connection.
  7. Reconnect the power and test the speaker to ensure the connection is secure and sound is restored.
  8. Use cable ties or clips to secure the wiring in place.
  9. Put any panels removed back to access the speaker.
  10. Reconnect the car battery’s negative terminal.

Method 2: Using Crimp Connectors

Materials and Tools

  1. Soldering iron
  2. Solder
  3. Heat shrink tubing

Steps

  1. Follow steps 1-4 from Method 1.
  2. Apply the solder to the twisted wires to fuse them securely.
  3. Slide heat shrink tubing over the soldered connection and heat it to shrink and seal the tubing.
  4. Follow steps 7-10 from Method 1.

Method 3: Using Soldering

Materials and Tools

  1. Butt connectors or crimp connectors
  2. Crimping tool
  3. Heat shrink tubing or electrical tape

Steps

  1. Follow steps 1-4 from Method 1.
  2. Crimp butt or crimp connectors onto the exposed wire ends.
  3. Cover the connectors with heat shrink tubing or electrical tape to insulate the connection.
  4. Follow steps 7-10 from Method 1.

Method 4: Using Extension Cables

Materials and Tools

  1. Wire stripper
  2. Wire crimpers
  3. Heat shrink tubing or electrical tape

Steps

  1. Follow steps 1-4 from Method 1.
  2. Cut out the damaged section and strip both ends of the wire.
  3. Splice in a new wire section using wire crimpers to secure the connection.
  4. Cover the spliced area with heat-shrink tubing or electrical tape.
  5. Follow steps 7-10 from Method 1.

Method 5: Using Wireless Solutions

Materials and Tools

Speaker wire repair kit (includes various connectors, solder, heat shrink tubing, etc.)

Steps

  1. Follow steps 1-4 from Method 1.
  2. Follow the instructions provided with the repair kit to fix the speaker wire.
  3. Follow steps 7-10 from Method 1.

Method 6: Using Punch Connectors

Materials and Tools

  1. Flashlight
  2. None (hands only)

Steps

  1. Identify the speaker wire connections between the speaker and the head unit. These are usually found on the back or underside of the devices.
  2. Use the flashlight to check for loose, disconnected, or frayed wires.
  3. Securely push loose wires back into their connectors until they click or snap into place.

Method 7: Using Scotchlok Connectors

Materials and Tools

  1. Car owner’s manual
  2. Replacement fuses (check your manual for specific type and amperage)
  3. Fuse removal tool (optional but recommended)

Steps

  1. Refer to your car’s owner’s manual to locate the fuse box and identify the fuses related to the speaker system.
  2. Visually check the fuses for any signs of damage, like a broken filament.
  3. If a fuse is blown, carefully remove it and replace it with a new fuse of the same type and amperage rating. Use a fuse removal tool for easier handling.

Method 8: Using Wire Nuts

Method 8: Test the Speaker

  1. Known-working audio source (e.g., phone, MP3 player)
  2. Auxiliary cable (if needed)

Steps

  1. Connect the known working audio source to the head unit using the appropriate cable (e.g., auxiliary cable).
  2. Play audio content and check if the sound comes out of the affected speaker.
  3. If the speaker remains silent, the issue might lie with the speaker rather than the wiring.

Method 9: Replace Damaged Wires

Materials and Tools

  1. New speaker wire (gauge appropriate for your speaker system)
  2. Wire strippers
  3. Wire cutters (optional)
  4. Crimp connectors (optional but recommended for secure connections)
  5. Electrical tape or heat shrink tubing (optional for insulation)
  6. Soldering iron and solder (optional, for the most secure connection)

Steps

  1. Cut a sufficient length of new speaker wire and strip the insulation from both ends using wire strippers. Expose about 1/2 inch of bare wire on each end.
    1. Insert the bare wire ends into appropriate crimp connectors and crimp them securely using a crimping tool.
    2. Twist the bare wire ends together tightly and solder them for a more permanent connection.
  2. Connect the repaired speaker wire to the speaker and head unit terminals, ensuring proper polarity (positive to positive, negative to negative).
  3. Wrap the connections with electrical tape or heat shrink tubing for additional protection and insulation.

Note: Always consult your car’s owner’s manual for specific instructions and safety precautions when dealing with electrical components. If you’re unsure about any step, seek help from a qualified car audio professional.

Testing Your Repairs

After you have repaired the speaker wires, it is crucial to test your repairs to ensure they are effective. One of the best tools for this is a multimeter. A multimeter allows you to test the continuity and resistance of the speaker wires, helping you identify any breaks or shorts in the wiring. For a detailed guide on testing your repairs with a multimeter, refer to our comprehensive article on the subject.

Troubleshooting Tips

Common Wire Issues

  1. Check Connections: Ensure all connections are secure at the speaker and head unit. Sometimes, wires can come loose over time, causing sound issues.
  2. Inspect for Damage: Look for visible damage to the speaker wire, such as cuts, fraying, or corrosion. If you find any damage, you may need to repair or replace the affected wire section.
  3. Test with Another Speaker: If possible, connect a known-working speaker to the same wires to determine if the problem lies with the speaker or the wiring.
  4. Check Fuses: Verify that the fuses related to the speaker system are intact. Blown fuses can cause the speakers to stop working.
  5. Swap Speaker Channels: If your car has multiple speakers, swap the left and right channels to see if the issue follows the speaker or stays with the channel. This can help identify the problem with the speaker or the wiring.
  6. Use a Multimeter: If you have a multimeter, you can test for continuity along the car speaker wires to check for breaks or shorts.

Quick Fixes

  1. If the wire is frayed, you can trim the damaged portion and reconnect the wire.
  2. Twist the exposed ends of the wire together and secure them with electrical tape if necessary.
  3. Use wire connectors or crimp connectors to join severed wires securely.
  4. When reconnecting wires, observe proper polarity (positive to positive, negative to negative) to avoid phase cancellation and ensure optimal sound quality.
  5. If troubleshooting and quick fixes don’t resolve the issue, consider consulting a professional car audio technician for further diagnosis and repair.

Conclusion

In conclusion, the provided information gives easy-to-follow steps for fixing speaker wire problems in your car. It covers various methods, from basic twists and tapes to more advanced soldering and wire splicing. 

Additionally, it offers helpful tips for troubleshooting common issues and quick fixes for minor problems. By following these instructions, you can make sure your car’s audio system sounds its best. Always prioritize safety and seek professional help if needed.

Frequently Asked Questions(FAQs)

  1. Look for cuts or breaks in the wire.
  2. Cut out the damaged section and reconnect the wires securely.
  3. Make sure it works before putting everything back together.
  1. Remove insulation and twist wires together.
  2. Use soldering, crimp connectors, or tape.
  3. Cover the connection for safety.
  1. Make sure wires are connected properly.
  2. Look for blown fuses and replace them if needed.
  3. See if it works with another source or speaker.
  4. Make sure the volume and audio settings are correct.
  1. Look for visible damage like torn cones.
  2. Fix if possible; otherwise, replace with a new speaker.
  3. Make sure the new speaker works properly.
  4. Think about getting better-quality speakers if needed.

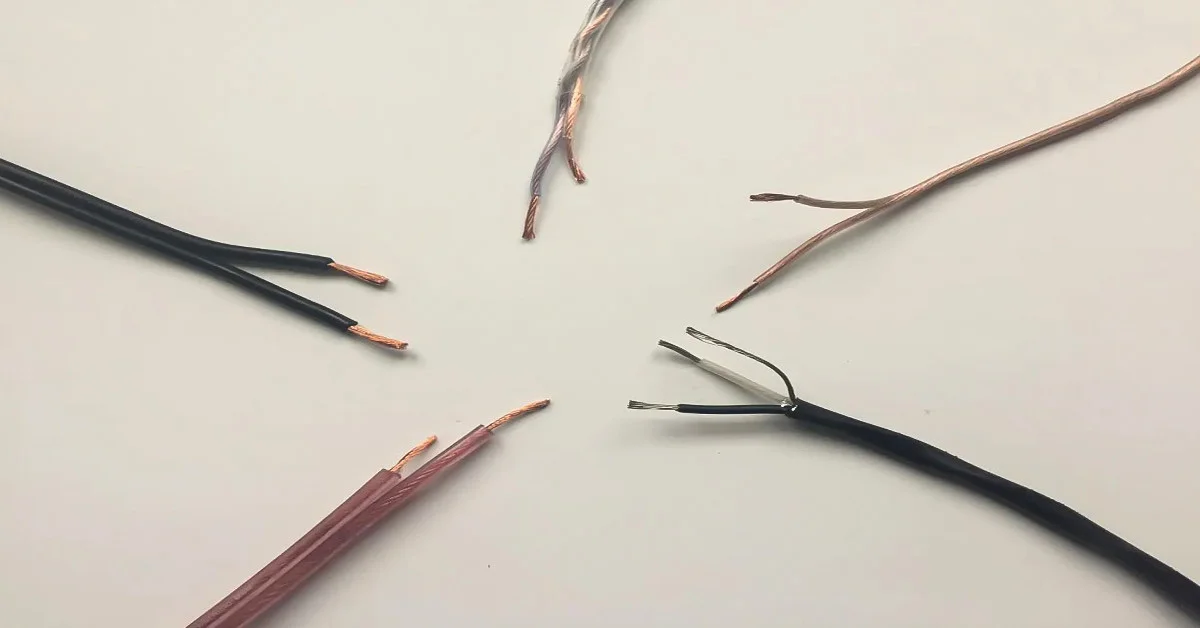
To troubleshoot a stereo that is not working in your car, check the wiring connection to ensure all connections are secure. Verify that the car speaker wires are properly connected to the amplifier or head unit. Also, inspect for any visible damage to the cables or connectors that might be causing the issue.

If your car audio system is producing distorted sound, it could be due to a loose speaker wire or a poor connector connection. Make sure all wires are securely attached to the speakers and the amp. You may also want to check the amplifier settings and adjust the audio signal accordingly.