Jump to
How to Install Car Speaker Spacers with Ease

Do you want to install car speaker spacers? No worries, We are here for your help. Welcome to the world of enhanced audio with car speaker spacers!
This guide will help you install speaker spacers, whether you’re experienced or new to customizing your car’s sound system. It covers all the steps you need to follow.
Spacers can make a difference in how you experience music in your car, providing better alignment and sound insulation.
Key Takeaways
- Proper preparation and gathering of tools/materials are paramount.
- Measure twice and install once to ensure the correct fitment of spacers and speakers.
- Post-installation testing and troubleshooting are vital to achieve optimal sound quality.
Understanding the Importance of Speaker Spacers
Speaker spacers serve a crucial role in car audio setups. They are used to put speakers in door panels or other areas where the cavity isn’t deep enough for the speaker.
Definition and Purpose of Speaker Spacers
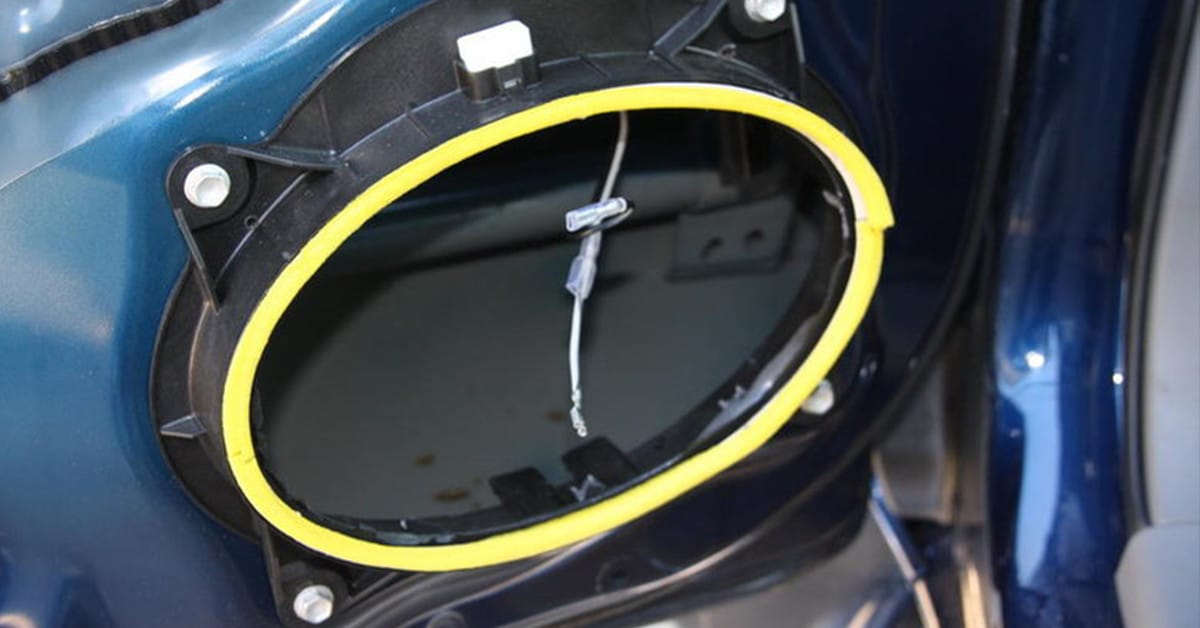
Speaker spacers are rings or gaskets that create a safe gap between the car panel and the speaker. Different types of materials are used in manufacturing. These materials include plastic, wood, foam, and metal. The choice greatly depends on your preference and the specific needs of your audio setup.
Preparing for Installation
Before installing spacers, make sure to review our guide on how to properly install car speakers for the best results.
- Park your car in a secure and flat area.
- Make sure to disconnect the battery to avoid any electrical issues.
- Gather all necessary tools within reach.
- Clear the area of any potential hazards.
- Make sure there’s ample lighting.
- Lay out a soft cloth to place components on, avoiding scratching.
Step-by-Step Installation Guide: Install Car Speaker Spacers
Step 1: Gather the Required Tools and Materials
Before starting, make sure you have the correct tools and materials to avoid any problems. Here is what you’ll need:
- Speaker spacers (compatible with your car model and chosen speakers)
- Replacement speakers (if you’re upgrading)
- Screwdrivers set (philips-head and flat-head)
- Socket wrench set
- Panel removal tool (for prying off door panels without damage)
- Wire stripper/cutter
- Soldering iron and solder (optional, for secure connections)
- Electrical tape or heat-shrink tubing
- Adhesive tape or glue (depending on the type of spacer)
- Torx drivers (if applicable)
- The drilling machine and drill bits (if new screw holes are needed) are used.
- A notepad and pen (for taking notes during disassembly)
- Digital camera or smartphone (to take pictures for reassembly reference)
Step 2: Prepare the Car and Remove the Old Speakers
Before you start, make sure you park your car on a level surface and turn off the ignition.
- Disconnect the negative terminal of your car’s battery to prevent any electrical shorts.
- Use the panel removal tool to pry off the speaker grills or door panels carefully. Take your time with this step to avoid damaging clips or upholstery.
- Remove the mounting screws or bolts holding the old speakers in place using the appropriate screwdriver or socket wrench.
- Take a photo of the wiring before disconnecting the old speakers for reference during reinstallation.
- Depress and pull gently if it’s connected with a clip. If it’s soldered, you may need to remove the solder or cut the wire to replace the connectors.
Step 3: Measure and Choose the Right Speaker Spacers
The wrong spacer size could cause improper fitting or poor sound quality.
- Measure the depth and diameter of your existing speakers and note the bolt pattern. Compare these measures with the specifications of your new spacers.
- Choose spacers that match these measurements. If you cannot find a perfect match, spacers can sometimes be customized, or adapters can be used to fill gaps.
Step 4: Install the Speaker Spacers
With the old speakers out and the correct spacers chosen, it’s time to fit them into place.
- Position the spacer in the speaker cavity and line up any screw holes. If no pre-existing holes match up, you may need to mark and drill new ones.
- Secure the spacer in place using screws or bolts (some prefer adhesive or a combination).
If you’re adding spacers to door speakers, check our guide on door speaker installation for any specific requirements.
Step 5: Mount the New Speakers onto the Spacers
With the spacers installed, you can now mount the new speakers.
- Line up the spacer’s new speaker, ensuring any wiring terminals are accessible.
- Secure the speaker using the screws provided with them. Do not over-tighten, as this may damage the speaker frame or spacer.
Step 6: Test and Adjust the Sound
Before buttoning everything up, testing the audio to ensure it’s working properly is crucial.
- Reconnect the speaker wiring to your new speaker. If there were any changes to the wiring, like adding new connectors, ensure they are secure.
- Reconnect the car battery and turn on your audio system to test the speakers.
- Adjust the stereo settings to your preference and listen for clarity, balance, and overall performance.
Note: Remember, personal safety and the safety of your vehicle come first. Always consult your user’s manual and adhere to all safety guidelines when performing DIY tasks on your vehicle. Upgrade your car’s audio system for a satisfying and immersive sound experience while driving.
Benefits of Using Car Speaker Spacers
- Enhanced sound quality: By aligning the speaker correctly with the spacer, sound waves travel more effectively without distortion.
- Reducing vibrations and interference: Spacers help reduce excess vibration and noise interference, offering a cleaner listening experience.
Choosing the Right Size of Speaker Spacers
It must be stated how important it is to choose the correct size for speaker spacers.
- Measure the depth of the speaker and the mounting location to ensure proper fit. If in doubt, consult with a professional or your spacer manufacturer.
- The correct spacer should perfectly align with the mounting holes of your speaker and the ones on your car for a fuss-free installation.
Tips for Installing Car Speaker Spacers
- Always measure twice and cut once, ensuring the spacers are appropriately sized.
- Do not overtighten screws, as this can lead to warping or damage to the speaker.
- Be mindful of maintaining the polarity of the speaker wires for optimal sound quality.
Testing and Adjusting the Audio System
- Turn on your car’s stereo and play audio at various volumes.
- Listen carefully to the sound, paying attention to clarity and any distortion.
- If the sound isn’t quite right, adjust your audio system’s equalizer settings or consult a professional for further tuning.
Troubleshooting Tips
- Incorrect fit: Double-check measurements or consult with a professional.
- No sound: Check connections to ensure the wiring is correct and secure.
- Distortion: This may be due to loose fittings. Ensure that both the speakers and spacers are tightly secured.
Conclusion
In conclusion, install Car Speaker Spacers is an easy process. Upgrading your car’s audio system with speaker spacers can be a fulfilling project that enhances your driving experience. You can expect a seamless installation process that rewards you with high-quality sound by following the steps provided. Taking time and being careful with each step is key to success. For more comprehensive information and resources on speaker installation, including spacers, visit our speaker installation guide hub.
Frequently asked Questions (FAQs)
Yes, they’re crucial for properly fitting aftermarket speakers into your vehicle.
They are used to enable aftermarket speakers to fit into the space originally designed for factory speakers.
For optimal sound quality, properly enclosures are recommended, especially for subwoofers.
Speed clips are used to provide a secure mounting point where screwing into metal isn’t feasible.
Cooper Katzeel
Car Enthusiast
Cooper Katzel, a dedicated car enthusiast, delves into the world of automobiles and audio systems. With a deep interest in cars and a focus on superior sound, Cooper’s expertise traverses the spectrum. His journey is a delightful exploration of automotive wonders and the world of car speakers. Cooper’s passion and technical know-how make him a trusted advisor for car enthusiasts.
Follow On Instagram
Recent Posts
- All Post
- Blog
- Car Speaker
- Car Subwoofer
- Pro Tips & Guides
- Back
- Speaker Wire


Dream Life in Paris
Questions explained agreeable preferred strangers too him her son. Set put shyness offices his females him distant.


