Jump to

Is there any issue with the car speaker wires? Today, let’s dive into the world of car audio and explore a fundamental aspect that often gets overlooked – test car speaker wires with multimeter.
Don’t worry if you’re not an electrical expert; we will break it down into simple steps using everyday language. So, let’s get started on this journey to ensure your car’s sound system is top-notch.
Key Takeaways
- To check if a car speaker wire is okay, use a digital multimeter. Set it to ‘resistance (Ω)’ mode and connect the meter’s leads to each end of the wire.
- If the reading is anything above 0 Ohms, your car speaker wire is fine.
- However, if it shows 0 Ohms, the wire is bad or damaged and needs replacement.
What is Speaker wires or cables?
Speaker cables are the wires connecting your car speakers to the amplifier. These wires have three important electrical properties: resistance, capacitance, and inductance. Resistance is a key factor – wires with low resistance let more power from the source go into the speaker coil, resulting in louder sound and more power.
Whether you love music or speak in public, having speakers that work well is crucial. Many speakers don’t come with wires, and that’s where speaker wires come in. They’re often the main reason car speakers may need to be fixed. What signs indicate that there might be a problem with your car speaker wire?
Factors that affect the wire’s resistance
- Single wires or Bi-wires
- Terminations
- Material of wire
- Length of the Wire
Signs of Problematic Speaker Wires
In systems where speakers are set up over long distances or if the wires are damaged, connection issues can often arise. Fixing these problems might be easy, but figuring out what’s wrong can be challenging. Look out for these signs to identify faulty speaker wires:
Speakers Suddenly Stop Working
It’s frustrating when you’re all set to enjoy some music, and suddenly, your speakers refuse to work. This clearly indicates that something might be off with your speaker wires.
Speakers Only Make a Buzzing Sound
If your car speakers are producing a buzzing sound without playing the audio, the wires are likely causing the issue. The buzzing indicates that the speakers are working, but there’s a problem with the cables’ connection.
Method 1: Test Car Speaker Wires with Multimeter
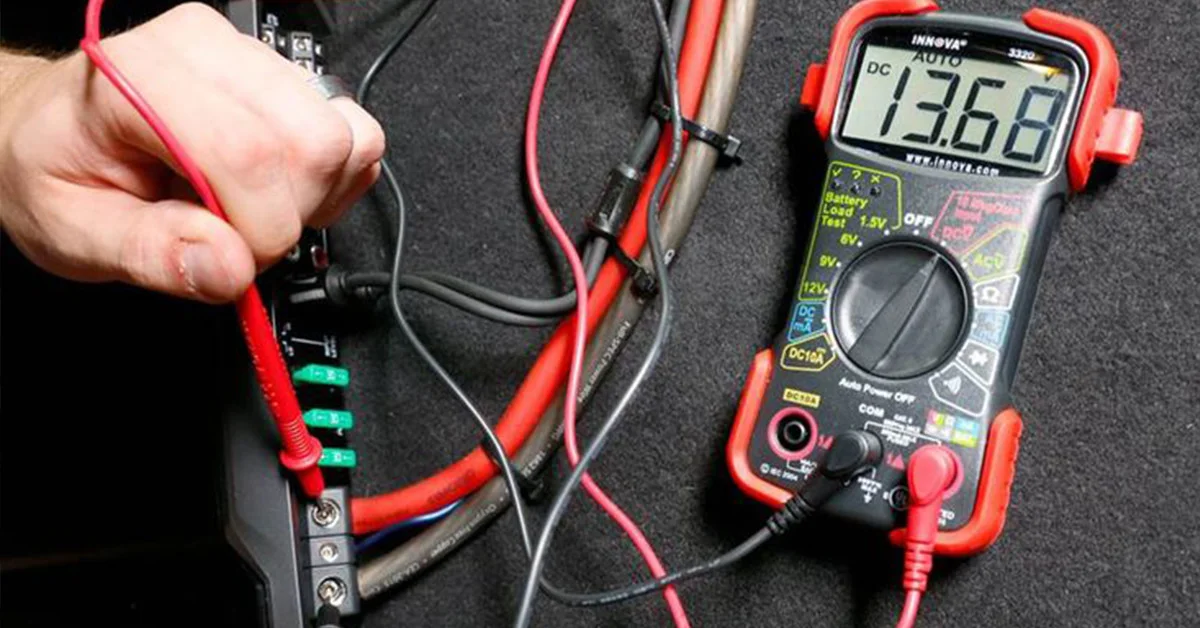
A multimeter is a versatile tool that can be used for various electrical troubleshooting tasks, including testing car speaker wires. Whether you’re diagnosing crackling speakers or complete audio silence or want to be proactive in maintaining your car’s sound system, knowing how to use a multimeter to test speaker wires can be valuable.
What you'll need:
- A multimeter
- Basic knowledge of how to use a multimeter (if you’re unfamiliar, consult the user manual or refer to online tutorials)
- Wire strippers (optional but helpful for accessing bare wire ends)
Steps:
- Prepare the speaker wires: Locate the car speaker wires you want to test. They’ll typically be coming from the car stereo or an amplifier, leading to the individual speakers. If the wires are bundled together, identify the specific pair you want to test by color coding or tracing them back to their respective speaker. Strip a small section of insulation from the ends of each wire to expose bare metal.
- Set the multimeter to continuity mode: Look for the Ω (ohm) symbol with a straight line above it. This setting allows the multimeter to beep or display a low resistance value when a complete circuit is detected.
- Touch the multimeter probes to the bare wire ends: Hold one probe to the bare end of one wire and the other probe to the bare end of the other wire.
Observe the results
- Beep and low resistance reading: If the multimeter beeps and displays a low resistance value (usually below 10 ohms), the wire is good and has continuity.
- No beep and high resistance reading (OL): If the multimeter doesn’t beep and displays “OL” or a very high resistance value, the wire is broken or has a faulty connection somewhere along its length.
Repeat for other speaker wires: Test each speaker wire in your car’s audio system following the same steps.
After testing and identifying the faulty wires, fixing issues found during testing is the next crucial step to ensure your car’s audio system functions flawlessly. Proper repairs and maintenance ensure that the sound quality is not compromised and the electrical connections are secure.
Method 2: Testing car Speaker Wiring with a Battery
If you’ve checked the wiring and it looks good, the issue might be with the speaker. To confirm, you can perform a simple test using a 9-volt battery.
- Connect the Leads: Attach the leads of your speaker to the 9-volt battery. Connect the positive lead to the positive end of the battery and the negative lead to the negative end.
- Check for Pulsing: If the speaker starts pulsing, it’s a good sign. A pulsing speaker indicates that the wiring is correctly connected. If you observe this pulsing, it means your speaker is still operational.
- Apply the Same Test to the Tweeter Speaker: Repeat the same process for the tweeter speaker as you did for the woofer speaker.
Things to Keep in Mind
- Avoid keeping the 9-volt battery connected for too long to prevent potential damage to the speaker.
- Always visually inspect your multimeter before using it. If you notice any damage, assume it’s not working correctly. Store the probes and unit in a protective case when not in use.
- Examine the probes for damage. If the insulation is broken, it’s best to replace them. A broken probe should not be used with a multimeter.
Safety Precautions
- Always work with electrical tasks. It’s safer to have someone with you.
- Use safety gear when necessary, such as hats and gloves. Use an insulated rubber mat for currents over 50 volts or exposed wiring.
- Avoid taking measurements in humid or damp conditions.
- Keep a close eye on your multimeter for any signs of issues. Any irregularities could pose safety risks.
- Be aware of potential hazards in the environment, including flammable dust.
- Remember, even in small electrical projects, it’s crucial to prioritize safety to prevent any potential harm.
Additional tips
- Identify speaker polarity (optional): Some have positive and negative terminals. While continuity testing doesn’t require identifying polarity, reinstalling speakers or troubleshooting further can use the multimeter’s DC voltage setting to determine the positive and negative wires. Touch the probes to the speaker terminals and note the reading. Reverse the probes and observe the reading again. The higher positive voltage reading terminal is typically the positive speaker terminal.
- Check for shorts: If you suspect wires might be touching and causing a short circuit, set the multimeter to a higher resistance range (e.g., 20 kΩ) and connect the probes to different combinations of exposed wires and speaker terminals. A beep or low resistance reading when you shouldn’t have one indicates a short circuit.
Following these steps and tips, you can easily test your car speaker wires with a multimeter and diagnose any potential issues affecting your audio system.
Common Issues with Your Car Speakers & Wiring
If your cars sound isn’t up to par, there could be a few reasons behind it.
Car Wiring Connections
Wireless and connections in your car’s audio system may loosen or break. Take a good look around to see if anything needs fixing. Additionally, the issue might be with the car speaker wires. We’ll discuss how to check that shortly.
Speakers Grounding Wire
When the grounding wire is loose or disconnected, problems can arise. Make sure to fasten the wire securely in a safe spot. You might hear a buzzing or whining sound if there’s an issue with the ground wire.
Car Amplifiers
Inspect how your car amplifier is set up. Ensure that all the connections are secure and stable.
Car Speakers
If you’re familiar with the sound of a damaged speaker, you might recognize it. Unfortunately, once a speaker is broken, it can’t be fixed, and you’ll need to get a new one. Look out for signs like a cracked speaker as well.
Importance of Proper Speaker Wire Testing
Impact on Audio Quality
Highlight the direct correlation between properly tested speaker wires and enhanced audio quality. Understand why investing time in testing is an investment in your overall audio experience.
Avoiding Damage to Audio Components
Examine how faulty speaker wires damage your car’s audio components and the financial implications of neglecting proper testing.
Conclusion
In conclusion, test car speaker wires with multimeter is crucial in maintaining an optimal audio experience. By understanding the basics, utilizing the right tools, and following a systematic testing process, you can ensure that your car’s sound system delivers the best performance possible.
Frequently asked Questions (FAQs)
Yes, you can test the speaker wire with a multimeter. A multimeter helps measure the resistance of the wire, ensuring it’s in good condition for optimal audio performance.
To check if a speaker is blown with a multimeter, set the multimeter to the ohms setting. Connect the leads to the speaker terminals. The speaker may be blown if the reading significantly differs from the speaker’s rated impedance.
Ideally, speaker wire should have low resistance, typically less than 5 ohms per 100 feet. Lower resistance allows more power from the source to reach the speaker, resulting in better audio quality.
To check speaker ohms with a multimeter, set the multimeter to the ohms setting. Connect the leads to the speaker terminals. The reading should match the speaker’s rated impedance. If it differs significantly, there may be an issue with the speaker or the wiring.
Cooper Katzeel
Car Enthusiast
Cooper Katzel, a dedicated car enthusiast, delves into the world of automobiles and audio systems. With a deep interest in cars and a focus on superior sound, Cooper’s expertise traverses the spectrum. His journey is a delightful exploration of automotive wonders and the world of car speakers. Cooper’s passion and technical know-how make him a trusted advisor for car enthusiasts.
Follow On Instagram
Recent Posts
- All Post
- Blog
- Car Speaker
- Car Subwoofer
- Pro Tips & Guides
- Back
- Speaker Wire


Dream Life in Paris
Questions explained agreeable preferred strangers too him her son. Set put shyness offices his females him distant.


