Jump to
How to Test A Car Speaker? | Easy Guide
Facebook
Twitter
Linkedin
Tumblr
Pinterest
Whatsapp

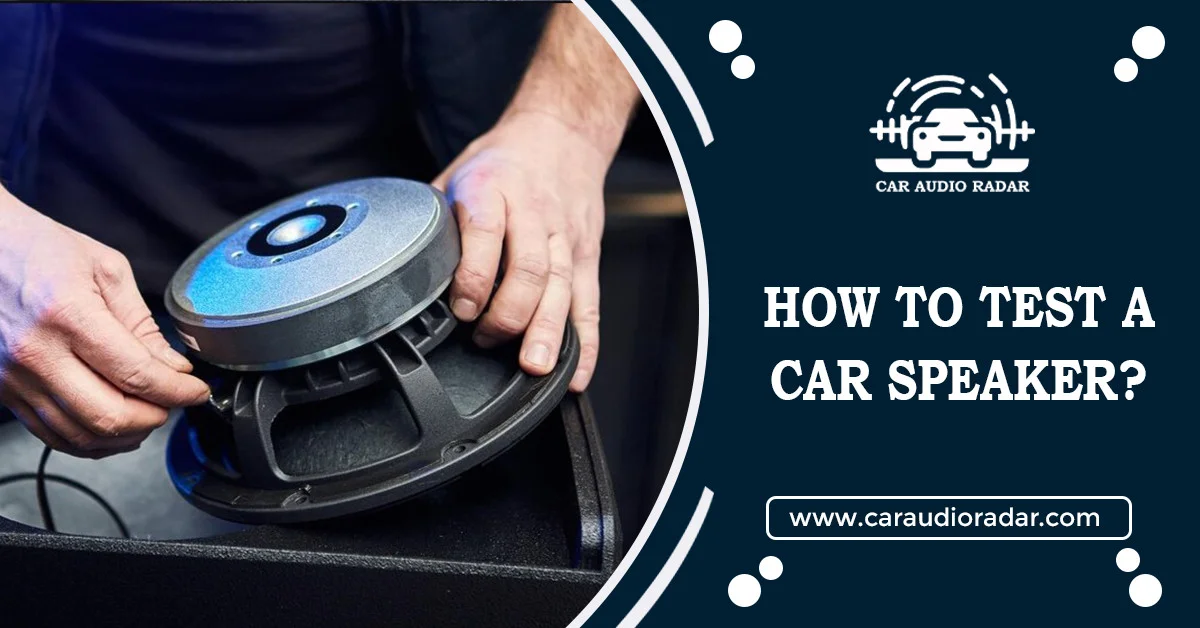
If you’re wondering how to test a car speaker, you’ve come to the right spot. Checking to see if your car speakers are working may appear daunting, but when broken down into some steps, it’s easier than you think. So, how do you test them?
One straightforward method is to use a 9V battery. Connect it to the speaker; if the cone moves, your speaker is ready to use! Another option is to use a multimeter to measure impedance, resistance, and voltage. It sounds technical, but it’s not as difficult as it seems.
Testing your car speakers is simple; no special tools are required; grab a 9V battery and a multimeter. The 9V battery also helps in determining the polarity of the speaker wires. I’ll walk you through the simple steps of checking and testing your car speakers in this article.
How to Test the Car Wires?
Before you start messing with your car speakers, check the speaker wires. This helps to avoid problems because speaker wires can become cut or frayed as they move. Also, it will save you time if a problem with your speakers requires more attention. Here’s a simple and fast method:
1: Obtain the Necessary Tools
You’ll need a digital multimeter or an analog voltmeter to test speaker wires. Analog voltmeters use needles and are outdated, but some people still prefer them. They only evaluate voltage.
Multimeters, on the other hand, measure voltage, resistance, and currents. If you’re checking voltage, a voltmeter will suffice. However, if you’re a car enthusiast looking for greater versatility, a multimeter is the way to go.
2: Turn off All the Components
Start by turning off all components of your stereo system. This eliminates the possibility of accidentally causing a short circuit, which could damage the entire setup.
3: Disconnect Your Wires from the Car’s Speaker Box
Now, disconnect the speaker wires from the speaker box. The method you use depends on the speaker or car model. Press the positive and negative clips or twist two connectors counterclockwise to release the wires. Select the method that best fits your needs.
4: Disconnect the Wires from the Receiver or Amplifier
Now, unplug the stereo receiver or amplifier’s wires. Simply disconnect the wires from the receiver or amplifier’s back. Be cautious when releasing them from mechanical locks. This might involve pressing a clip down or twisting two wire caps together. Just be careful with it.
5: Make a Closed Circuit With the Wires
After disconnecting the wires from the speakers and receiver or amplifier, create a closed circuit for a continuity test. Twist the wire ends together securely, but don’t overdo it—too much twisting can make it difficult to separate later. This closed circuit is critical for the upcoming continuity test.
6: Get Your Voltmeter or Multimeter Ready
Set up your voltmeter or multimeter. You can skip this step using a multimeter—it’s fine without calibration. You will, however, need to calibrate a voltmeter.
Please turn on your voltmeter and set it to ohms. This enables you to measure the resistance of the wire. Move the selector to the Ohms position, and you’re ready to go.
7: Calibrate Your Voltmeter
Before you start testing the wires, make sure your voltmeter is accurate. Connect the red and black leads for a quick test. If the voltmeter reads 0 ohms, it is properly calibrated.
If you see any other readings, your voltmeter isn’t accurate, and you should replace it. A precise voltmeter is essential for avoiding misleading results. This also applies to digital multimeters.
8: Test the Speaker Wires in Your Car
After you’ve completed all of the setup, it’s time to double-check your wires. Gently touch the open ends of your circuit with the red and black probes of your voltmeter or multimeter. Your voltmeter will display a resistance level if the wires are in good condition.
If your wires are cut or damaged, your tool will show an infinite resistance or “OL” (Open) on a multimeter and a constant tone. It is time to repair or replace your speaker wires if there is any damage.
Test the Car Amplifier
You might think your speakers are broken when the problem is with your amplifier. If your amplifier is damaged, it can produce distorted sound, frequently mistaken for speaker problems. How can you tell if the amplifier is the culprit? A faulty fuse or capacitor often causes amplifier problems. Follow these steps to check your car amplifier for problems:
1: Examine the Fuse
Locate your fuse box using your owner’s manual. Connect the red lead to one fuse pole and the black lead to another using your multimeter. The multimeter will beep if your fuse is in good working order. If you don’t hear a beep, your fuse is likely blown.
2: Test Your Capacitor
Set your multimeter to test capacitance and connect the positive and negative leads to the corresponding capacitor terminals. If your capacitor works correctly, your multimeter will display values close to its ratings. After double-checking your wires and amplifier, you’re ready to test your car speakers.
How to Test A Car Speaker?
It’s time to test your speakers now that you’ve verified the speaker wire connections, fuse, and capacitor. Try these four effective methods to check your speakers for problems or ensure they work correctly.
1: Listen to Its Sound Output Manually
This is similar to a speaker check-up. Listen carefully at comfortable volumes, ideally with the ear of a music enthusiast. Set the treble and bass levels to noon.
Your speakers may require more equalization if you notice a lack of range. Check for distortion next. Play a clean track through headphones or a home stereo to ensure no scratches. Then, in your car, play the same track. Keep an ear out for rattling, crackling, or muffled sounds. A speaker may be blown if it is muffled. Using the panning or fading function, isolate and identify the problematic speaker.
2: Inspect Your Speaker Visually
Begin by visually inspecting your vehicle’s speakers. Before any testing, please give them a thorough examination with your eyes. Look for visible problems such as loose wires, shaky cones, or broken parts. Inspect the cables for minor cuts that may be obscure just by looking.
3: How to Test Car Speakers With a Battery?
To perform this test, remove the speaker cover, detach the speaker, and test with a battery. Connect the speaker terminals to a 12-volt and a 9-volt battery, ensuring the negative battery terminals correspond to the negative lead and vice versa. You should hear a pulse or popping sound if the speaker functions correctly. If there is no sound, the speaker has been damaged.
4: How to Test Speakers With Multimeter?
You can use a multimeter to check if your speakers are working correctly. Connect the multimeter to the speaker terminals: positive (red) leads to the positive terminal, and negative (black) leads to the negative terminal. If the multimeter reads 1.0 ohms, your speakers are working. If it shows infinite resistance, it means the speakers have blown.
Common Car Speaker Problems
You’re checking your car speakers for one of two reasons: trying to diagnose a problem or thinking about purchasing new speakers. Understanding common problems can be highly beneficial, especially if your speakers have already been installed and cannot be returned. It all comes down to saving time and making sound decisions. So, here are a few of the most common problems that can harm your speaker:
1: Blown Speakers
A good speaker can save your music experience. The speaker will only work sometimes. However, with the right approach, you can quickly identify the problem.
2: Disconnected Speakers
This problem is caused by normal wear and tear, which occurs when the speaker’s cables, wires, or internal components become loose. The symptoms of disconnected speakers include The speaker acting glitchy and the audio frequently cutting out.
Conclusion
After you’ve tested your speakers and identified the problem, determine whether it’s repairable or if you need to replace them. It’s a good idea to inspect the speakers for damage carefully. Distortion occurs when there are holes, splits, or tears in the speaker. If the damage is severe, bring it to a technician to see if the speaker can be repaired. We hope you now understand how to test a car speaker and your entire car audio system.
Frequently asked Questions (FAQs)
How can I determine whether my car speakers are functional?
The battery test is the most effective way to test your speakers. Connect your speakers to the speaker’s lead terminals; if they produce a pulse, they work correctly.
How can a multimeter tell if your speakers are blown?
Connect the multimeter probes to the speakers’ terminals and measure the impedance. Blown speakers produce an infinite reading, whereas perfectly functioning speakers produce a 1-ohm reading.
Why are the speakers in my car crackling?
A faulty wire between the speakers and the amplifier can cause annoying crackling noises.
How many volts should be at the speakers?
Generally, most speakers work within a voltage range of about 5-12 volts. The specific requirements can be found in the speaker’s documentation. If unsure, consult a qualified expert to confirm that your speakers receive the correct voltage.
How can you check speaker voltage?
Consult the user manual or inspect the speaker’s body for the voltage output. Alternatively, set your multimeter to AC voltage, play an audible tone, and obtain a reading by testing the speaker output wires.
How can I test my speakers for sound?
Start by testing the speakers with a variety of music genres. Check the soundstage, focusing on width and depth, as the best speakers mostly produce a wide soundstage. Next, check for any distortion in the sound. While even the best speakers may have some distortion at high volumes, it should be minimal. If you can’t hear any distortions, your speakers are likely producing good sound.
Cooper Katzeel

Cooper Katzel
Car Enthusiast
Cooper Katzel, a dedicated car enthusiast, delves into the world of automobiles and audio systems. With a deep interest in cars and a focus on superior sound, Cooper’s expertise traverses the spectrum. His journey is a delightful exploration of automotive wonders and the world of car speakers. Cooper’s passion and technical know-how make him a trusted advisor for car enthusiasts.
Follow On Instagram
Please reauthorize instagram
Recent Posts
- All Post
- Car Speaker
- Pro Tips & Guides
- Speaker Wire
Difference Between Morel Maximo 5 and 6 for Your Car Audio
May 15, 2024
Does Speaker Wire Affect Sound Quality?: Find Out Here
May 14, 2024
How To Fix Speaker Wire In Your Car?: Proven Methods
May 13, 2024
Dream Life in Paris
Questions explained agreeable preferred strangers too him her son. Set put shyness offices his females him distant.
Subscribe to our newsletter
Don’t miss new updates on your email
Categories
Tags
Edit Template